
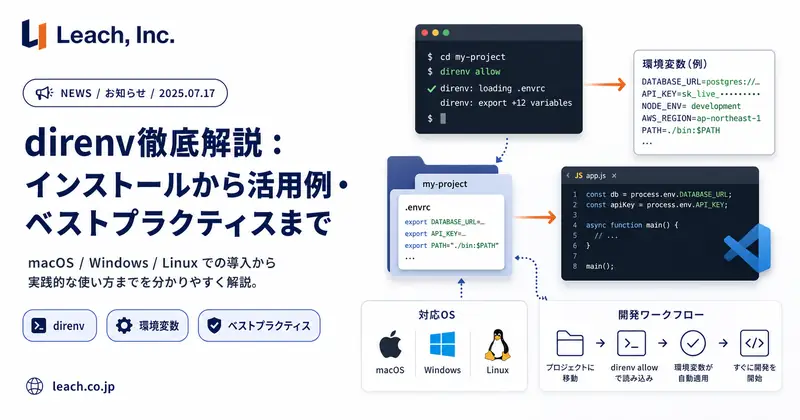
Managing different environment variables for each development project is a tedious task. direnv is a tool that automatically switches environment variables for each directory. With direnv, environment variables dedicated to that project are automatically loaded every time you enter a directory, and cleanly unloaded when you leave. Since environment settings are confined to each project, global shell settings are not polluted, and managing environment variables in line with the 12-factor app philosophy becomes easy. This article comprehensively explains from the overview of direnv to installation methods for macOS/Windows/Linux, basic usage, practical use cases, security precautions, advanced usage, troubleshooting, and handling in CI/CD.
What is direnv? Its Purpose and Benefits
direnv is a tool that works by extending existing shells and automatically loads/unloads environment variables according to the current directory. Using a dedicated .envrc file (and .env file depending on settings), it loads environment variables when you enter a directory (cd) and restores settings when you leave. This enables different environment construction for each project without complicating global configuration files like ~/.bash_profile or ~/.zshrc.
The main benefits of direnv are as follows:
- Environment separation per project: Even if Project A and B require different tool versions or environment variables, they switch automatically by defining dedicated environment variables in each directory. You don't have to switch global environments, realizing an isolated development environment.
- Simplification of environment variable management: Previously, we prepared
.envfiles and manuallysourced them, or set them in profiles at shell startup. With direnv, they are automatically applied linked to directory movement, reducing manual loading omissions and setting switching mistakes. - Environment sharing in teams: By including
.envrcin the repository, all team members can use common environment variable settings (e.g., API endpoints for development or debug flags). Members only need to install direnv and rundirenv allowto reproduce the common development environment. - Appropriate management of secrets: Confidential information (API keys and credentials) different for each project can be loaded per directory, so you won't accidentally mix them with other projects. Furthermore, with best practices described later, secrets can be handled safely without including them in source code management.
- Fast and language-agnostic: direnv is provided as a single static binary, and the hook processing before each command execution is very fast. It also does not depend on a specific programming language and can be used as a substitute or supplement for language-specific tools like Python's virtualenv or Node's nvm.
As described above, direnv is a tool that makes developers' environment variable management simple and powerful. Let's look at specific introduction methods.
Installation and Setup
Installation of direnv is done in two stages: "Installation of the main body" and "Hook setting to shell". First, install the direnv main body for each OS, and then add settings to hook (link) direnv to the shell you are using. The procedures for each supported OS/shell are as follows.
direnv Installation on macOS
On macOS, using Homebrew is the easiest. If Homebrew is already installed, you can introduce direnv with the following command:
# Install direnv with Homebrew
brew install direnv
After installation, perform shell hook setting. Since the default shell for macOS is Zsh, add the following line to the end of the ~/.zshrc file:
# Add direnv hook to Zsh
eval "$(direnv hook zsh)"
If you are not using Zsh, set as follows according to your shell (* append to the initialization file of each shell):
- For Bash: Add
eval "$(direnv hook bash)"to~/.bashrc - For Fish: Add
direnv hook fish | sourceto~/.config/fish/config.fish - Other shells (tcsh, Elvish, etc.): Follow the instructions in the official documentation and incorporate the output of
direnv hook <shell name>into the shell configuration.
After adding the settings, run source ~/.zshrc or restart the shell to enable the hook. Now direnv will automatically work in the new shell.
direnv Installation on Linux
On Linux, direnv is provided as an official package in many distributions. Here are examples of installation methods for major distributions.
- Ubuntu/Debian based:
sudo apt install direnv - Fedora based:
sudo dnf install direnv - Arch Linux:
sudo pacman -S direnv
After installing with the package manager, add a hook to the shell configuration file. The basic procedure is the same as for macOS; append the corresponding line (e.g., eval "$(direnv hook bash)" for Bash) to ~/.bashrc for Bash, or ~/.zshrc for Zsh. Please enter the correct command according to the shell you are using.
After setting the hook, reload the shell (source ~/.bashrc etc.) and confirm that the direnv hook is enabled. If configured correctly, automatic loading will occur when creating .envrc described later.
direnv Installation on Windows (including WSL)
direnv can also be used in Windows environments. Although it is not a Unix-based system, there are several ways.
- When using in WSL (Windows Subsystem for Linux): If you are running a Linux distribution such as Ubuntu on WSL, install direnv inside that WSL. The procedure is the same as for Linux mentioned above; for example, with Ubuntu on WSL, it can be installed with
sudo apt install direnv. After that, appendeval "$(direnv hook bash)"etc. to the configuration file of the shell (Bash or Zsh) on WSL. Even if you use VSCode via WSL, direnv works inside WSL and can set environment variables. Basically, the procedure inside WSL is the same as Linux. - When using in native Windows: To use direnv directly on Windows, first obtain the direnv executable file. There is a method using the binary provided by the official or using a Windows package management tool. For example, when using Winget, execute the following command in a terminal with administrator privileges:
winget install --id=direnv.direnv -e. This installs the Windows version binary of direnv and adds it to the path. Or, it is also possible to install using Scoop asscoop install direnv. There is also a method to manually downloaddirenv.windows-amd64.exefrom the GitHub release page and place it. After installation, perform settings to hook direnv on PowerShell. PowerShell differs from other shells in setting method, but according to the official documentation, to call the hook script for PowerShell, append the following to$PROFILE(PowerShell profile script).# Add direnv hook to PowerShell Invoke-Expression "$(direnv hook pwsh)"$PROFILElocation differs depending on the PowerShell version, but generally corresponds to%USERPROFILE%\Documents\PowerShell\Microsoft.PowerShell_profile.ps1etc. Open this file with an editor and add the above line. After adding, restart PowerShell to enable the direnv hook. If you are using Git Bash or Cygwin/MingW etc., introduce direnv according to those environments. In the case of Git Bash, obtain the Windows binary with the above procedure, and add the hook (eval "$(direnv hook bash)") to~/.bashrcof Git Bash to make it work. Similarly for Cygwin, introduce the direnv package in Cygwin and perform shell settings.
💡 Note: When using direnv on Windows, we recommend using WSL or Git Bash if possible. Although direnv itself supports PowerShell and other shells, it is mainly intended for use on Unix shells. With WSL, you can utilize direnv with the same operability as Linux. Also, direnv works without problems even in cases where VSCode is used via Git Bash.
This completes the installation of the direnv main body and incorporation into the shell. Next, let's look at the basic usage of direnv.
Basic Usage and How to Write .envrc
Once direnv is introduced, create an environment variable definition file .envrc in each project directory. In this file, write the settings and commands for environment variables you want to enable in that directory. Since .envrc is interpreted as a shell script (basically bash syntax), you can write descriptions to export environment variables like export VAR=value or simple logic to read other files.
Basic Procedure:
- Move to any project directory. For example, create a
my-projectdirectory and move:mkdir ~/my-project cd ~/my-project - Create an
.envrcfile directly under that directory and write the environment variables you want to set:
Example) Content ofmy-project/.envrc:export FOO="foo" # Set environment variable FOO export BAR="bar baz" # Enclose in quotes if value contains spacesNote that environment variables are defined with theexportstatement like this in.envrc. Note that simple "KEY=VAL" format is not loaded (since it is a shell script,exportis required). - After saving
.envrc, perform the operation to grant permission only for the first time. For security, direnv does not automatically execute.envrcseen for the first time. Execute thedirenv allowcommand to trust and allow the.envrcof that directory.$ direnv allow direnv: loading ~/my-project/.envrc direnv: export +FOO +BARIf displayed as above, it is successful.direnv: export +FOO +BARindicates that FOO and BAR have been added to the current shell environment. - From then on, every time you enter this directory with
cd, the contents of.envrcare automatically reflected, and environment variables FOO and BAR are set. Conversely, when you leave the directory (return to the parent directory, etc.), those variables are automatically unloaded (released) bydirenv: unloading.
.envrc file syntax and examples: Basically shell script. Here are some commonly used patterns.
- Directly export environment variables:
export API_KEY="abcdef12345" export DEBUG=1Just export the key and value. Quote if the value contains spaces or shell special characters. - Read from another file: There is a method to list confidential information in a separate
.envfile and read it on the.envrcside. direnv provides adotenvfunction to read.envfiles. For example, writingdotenvin.envrcimports the contents of the.envfile in the same directory. It is also possible to enable automatic loading of.envglobally in settings (v2.32 or later)..envrc example dotenv # Read .env in the same directoryexport PATH_add bin # Add bin directory to PATH (stdlib function described later)
Writing as above allows settings such as sourcing the.envfile (e.g., containing API keys) while adding thebindirectory to PATH. - Utilize direnv's standard library (stdlib): direnv provides many useful functions that can be used in
.envrc. For example,PATH_add <directory name>can be used to add a directory to the environment variablePATH. This is a function to writeexport PATH=$PWD/<dir>:$PATHmore safely and concisely.
There are also helpers for specific languages and tools. As an example, there is a series of functions calledlayout; writinglayout pythonautomatically generates and enables a Python virtual environment (venv) for the current directory.layout gosets up the Go language build environment, and so on. Using these, you can automate troublesome environment construction just by writing one line in.envrc.
(* Refer todirenv stdlibcommand or official man page for details of the standard library.) - Execution of commands: Arbitrary command execution is also possible in
.envrc. However, when setting the execution result to an environment variable, use shell syntax likeVAR=$(command). Example:export AWS_DEFAULT_REGION=$(aws configure get region)This is an example of setting the pre-configured AWS CLI default region to an environment variable.
If you change .envrc, you need to execute direnv allow again after updating the contents. For security, direnv blocks even "allowed" files if the file content changes. It may feel annoying to allow every time, but it is a safety measure to prevent automatic execution when changes are made unexpectedly from outside the project.
ℹ️ Hint: If you want to check if direnv is enabled in the current directory, you can check the loading status of
.envrcwith thedirenv statuscommand. If "loaded" is displayed, it is applied; if permission is required, that fact is displayed. This is a useful command for troubleshooting.envrc.
Typical Use Cases
direnv is active in various situations. Here we introduce main use cases in actual development sites.
- Automatically apply different environment variables for each project: For developers dealing with multiple projects in parallel, mistakes of accidentally using environment variables for Project A in Project B should be avoided. With direnv, it is easy to place
.envrcin each project directory, for example, setting database URLs and API endpoints for development in A, and different values in B. Just by moving directories, it switches to the appropriate environment variable set, preventing defects due to omission of switching development environments. - Sharing environment settings in team development: By including the direnv configuration file
.envrc(or a template file like .env.example) in the repository, new members joining the project can also smoothly build the environment. Instead of conveying "what environment variables are needed in this project" in documentation,.envrcitself becomes live configuration information. However, as described later, care must be taken not to commit confidential information directly. Ideally, prepare dummy values or template files, and operate so that each person fills in the actual values in.env. - Management of confidential information (secrets): direnv is also useful from a security perspective. Secrets such as API keys and passwords that differ for each project are loaded only within each directory. They are safely isolated without affecting other projects. Also, although direnv itself is not a secret management tool, it can be used in combination with Mozilla's SOPS or
gopassin.envrcto decrypt and export encrypted secrets. Secrets are turned into environment variables only when needed, and discarded when leaving the directory, so minimum necessary exposure is sufficient. - Switching versions of multiple languages/tools: direnv is useful even in cases where programming languages or tool versions used differ for each project. For example, you can automatically build and enable a Python virtual environment within the project directory (
layout python), or switch Node.js versions for each project. Even with Ruby, Go, Java, etc., necessary paths (e.g., specific SDK paths) can be passed per project. This avoids dependency conflicts between projects and guarantees operation with the exact versions and settings required by each project. - Switching between production and staging environments: direnv is also active in infrastructure construction and deployment work. For example, in Terraform IaC projects, it is necessary to change AWS credentials and Terraform environment variables (
TF_VAR_xxx,TF_CLI_ARGS, etc.) for each environment. by creating directories for each environment name using direnv and loading different AWS authentication information and configuration files there, switching accounts and regions can be done smoothly. It is safe because it switches just by moving directories, like "dev variable set for development AWS account, prod set for production".
As described above, direnv is useful in a wide range of scenes from local development to cloud deployment. In the next chapter, we will explain security points for safely utilizing direnv.
Security Considerations and Best Practices
While direnv is convenient, since the contents handled (environment variables) often contain confidential information, operation with attention to security is important. Here we introduce points and best practices for using direnv safely.
- Meaning of initial permission (
direnv allow): direnv does not automatically execute.envrcplaced in the project directory. It explicitly requests thedirenv allowcommand to confirm with the user "Is it really okay to execute the.envrcin that directory?". With this mechanism, for example, even if a project cloned from a third party's repository contains a malicious.envrc, damage can be prevented because it is not executed unless allowed. Be sure to check the contents and judge if it is a trustworthy setting before doingdirenv allow. Conversely, if you want to cancel execution, you can reset permission with thedirenv denycommand. - Do not commit confidential information directly: It is basic, but do not write secret values such as API keys and passwords directly in
.envrcand commit them to the repository. If it is a public repository, it leads to leakage, and even in a private repository, it can leak if authority is passed to unnecessary people. As a best practice, it is recommended to place secrets in external files ignored by .gitignore (.envetc.) and read them from.envrcwithdotenvetc. Or, a method of calling an external tool such as AWS Vault within.envrcto temporarily obtain environment variables is also conceivable. .envrcsharing policy: When using direnv in a team, it is necessary to consider whether to include.envrcin the repository. Generally, it is no problem to share.envrcas long as it does not contain confidential information. However, if different settings are required for each developer, there is also an operation where template-like contents are written in.envrcand each person modifies and uses it appropriately. For example, flexible configuration is possible such as "read .local.envrc if it exists" in.envrc, and write individual override settings in.local.envrc. Since direnv has a mechanism to explore.envrcin parent directories, it is also possible to divide files into common parts and individual parts.- Plain text secret storage and its alternatives: If you do not want to write secrets in plain text in
.envrcor.env, there is a method to save encrypted values and decrypt them at runtime. Combining with Mozilla SOPS or various Vault services mentioned above, calling a decryption command in.envrcand exporting to an environment variable is also an option. Since direnv itself only incorporates the result into the environment, it can be used generally. The point is to manage the key required for decryption separately and safely (e.g., use personal PGP key or cloud KMS). - Use in untrusted repositories: When cloning and running someone else's project you don't know, be especially careful about the contents of
.envrc. Theoretically, it is possible to plant malicious commands likerm -rf ~/important_folder. Since direnv is merely a tool to automatically execute shells, acquire the habit of checking the contents before execution. Even if it is an.envrcwritten by a colleague, it is safe to check if there are any unexpected side effects (e.g., settings that overwrite global environment variables).
If you operate direnv based on the above points, you will be able to enjoy convenience without major accidents. In short, since it means "managing environment variables with code", it is important to handle it with the same awareness as normal code reviews and security checks.
Advanced: Integration with Hooks and Other Tools
direnv is a simple mechanism, but advanced utilization is possible by linking with various tools depending on ingenuity. Here we introduce convenient usage methods by integration with language version management tools and combination with other tools such as Docker/Terraform.
- Integration with language version management tools (asdf, pyenv, etc.): direnv becomes powerful when combined with version management tools for each language. Integration with asdf is particularly famous. [asdf] is a tool that can uniformly manage multiple language runtimes, but by introducing a plugin called
asdf-direnv, the language version required by that project can be automatically enabled when entering the directory. For example, it is a mechanism where direnv sets the version of the language (Ruby, Node, etc.) specified in the.tool-versionsfile via theasdfcommand when entering the directory.
Also, in cooperation with Python's virtualenv, simply writinglayout pythonin.envrcautomatically generates and activates a virtual environment. Since an isolated Python environment is obtained for each project folder, when development is finished and you leave the folder, changes to environment variablesVIRTUAL_ENVandPATHalso disappear, and the global environment is not polluted. For Node.js, it is also possible to call tools such as nvm and volta via direnv to automatically switch versions. In short, you can automate the settings of various development tools using direnv as a hub. - Use in Docker/Container environment: direnv is also useful in Docker container development. For example, in Docker Compose, environment variables are usually defined in a
.envfile, but if you load.envwith direnv during development, you can use the same environment variables when trying various commands in the host side shell. Also, since application settings running on Docker can be centrally managed with direnv, discrepancies in environment variables between container and host can be prevented.
Furthermore, even in a development container environment like VS Code's Dev Containers, if direnv is introduced inside the container, environment variables required for each project can be automatically loaded. By arranging both the host's direnv settings and the direnv settings inside the container, a consistent environment can be realized both at the developer's hand (host) and inside the CI container. - Combination with Terraform and cloud tools: As mentioned earlier, direnv is also useful in Infrastructure as Code (IaC). Especially in Terraform, it is necessary to switch numerous environment variables (authentication information, variable file paths, etc.) for each project, and automating them with direnv is efficient. As an actual example, a team uses direnv to automatically set variable files (
-var-file) and AWS account information during Terraform execution, performing switching of AWS accounts and loading of confidential variables transparently. Also, combining with theaws-vaultcommand, operation using different AWS authentication for each directory is possible. This allows direnv to set up the appropriate environment behind the scenes even when handling multi-accounts and multi-regions with a single codebase. - Other hook utilizations: direnv has not only the function to install hooks for each shell but also allowing users to install global extensions. If you create a file
~/.config/direnv/direnvrc, the contents written there are executed before .envrc of all projects. For example, you can define common functions or incorporate company-specific convenient commands (internal proxy settings, etc.). If each developer uses a common direnvrc, functions can be extended, but please note that the contents are also under the control of direnv allow.
In this way, direnv demonstrates its true value in combination with other tools. In other words, you can leave anything "you'd be happy if done automatically when entering/leaving a directory" to direnv. Please try to utilize it creatively.
Troubleshooting: Common Problems and Solutions
We summarize problems often encountered after introducing direnv and their solutions.
- "
direnv: command not foundappears": If this error appears after installing direnv, the path may not be set. Depending on the installation method, path setting to~/.profileor~/.bash_profileis required. It is usually okay if installed via Homebrew, but if you placed the exe manually, add the directory to the environment variablePATHyourself (if Windows, register the location of the exe in the system PATH). Check if the installation is done correctly and check if the path is displayed withwhich direnv. - Environment variables are not loaded /
.envrcis ignored: The likely cause is that hook to shell is not functioning. If the lineeval "$(direnv hook ...)"appended to the shell configuration file is not executed correctly, direnv cannot detect directory movement. As a measure, try restarting the shell, properlysourceing the configuration file, checking if the configuration line is not behind the prompt change (needs to be placed after other settings). Also, note that in the case of Zsh, put it in~/.zshrcinstead of~/.zprofile. Executing thedirenv statuscommand allows you to confirm whether the direnv hook is enabled. - "
.envrc is not allowedappears": This is normal behavior, and direnv does not yet trust the.envrcof that directory. The remedy is to executedirenv allowin the current directory. Once allowed, that.envrc(as long as the content does not change) will be loaded automatically from the next time. Similarly, remember thatdirenv allowis required again after rewriting.envrc. Conversely, if you want to invalidate allowed.envrc, usedirenv deny. .envrcis not read correctly in Windows+WSL environment: A rare case when using direnv in WSL is newline code problem. If the.envrcfile edited on the Windows side contains CRLF (Windows newline), unexpected behavior may occur when loading in bash. In fact, in a case where direnv seemed to ignore the functionsource_env_if_existsin.envrcin WSL, it was resolved by correcting the file's newline code to LF. When editing in VSCode, pay attention to the newline code display, and if necessary, convert to LF with thedos2unixcommand.- Environment variables are not released / Influence remains in other directories: Usually direnv removes all variables set when leaving the directory, but if they remain, check if they were manually exported. For example, if you overwrite environment variables temporarily without going through direnv, they are outside direnv management so they are not released. Whether it is a variable under direnv management can be judged by direnv's output message (
-VARis displayed indirenv: export +VARordirenv: unloading). Also, since direnv runs in a subshell, aliases and shell functions cannot be exported specification. Note that phenomena such as aliases not being inherited are due to specifications.
If you keep these points in mind, most problems should be solved quickly. If it still doesn't work, debug with the output of direnv status or attaching the --verbose option, and search for Issues in the official GitHub repository if necessary.
Usage in CI/CD Pipeline
direnv is convenient on development machines, but let's also consider handling in CI/CD automation pipelines. In conclusion, it is not always necessary to use direnv in CI environments. This is because in CI jobs, it is common to explicitly set environment variables in scripts or use dedicated setting mechanisms (GitHub Actions secrets or GitLab CI variables). However, depending on the project, there are cases where you want to use the same .envrc as during development in CI.
Methods to utilize direnv in CI include the following:
- Load environment variables using direnv CLI: direnv provides commands to apply the environment even outside interactive shells. One of them is
direnv exec <DIR> <COMMAND>. This executes an arbitrary command in an environment where the .envrc of the specified directory is loaded. For example, if you dodirenv exec . terraform planin a CI script, you can execute the Terraform command with the.envrcof the current directory applied.
Also, there is a method usingdirenv export bash. This outputs a shell script fragment to export environment variables from the current.envrc. If youevalit, you can import environment variables into the CI job's shell. Specifically:eval "$(direnv export bash)" # This applies environment variables of .envrc to the current shellIf you execute the above during the CI build step, the same environment variables as the project can be used in subsequent steps. - Supply of secrets/environment variables: On CI, secrets are usually injected by CI tool functions for safety (e.g., GitHub Actions Encrypted Secret or AWS Parameter Store). If you write secret reading processing in
.envrcof direnv, that processing is also executed in CI. For example, if you put processing likeaws-vault exec <profile> -- direnv allowin.envrc, temporary credentials can be obtained via AWS Vault even in CI. However, note thatdirenv allowis automatically required on CI (because there is no permission initially). Since the CI environment is a clean machine, if you cannot perform operations equivalent todirenv allowin advance, there is a trick to place a permission file with the repository using theDIRENV_ALLOW_DIRenvironment variable, but it is not recommended for security reasons. - Alternative: In CI/CD, often just loading the .env file is sufficient without forcing direnv. While making development comfortable with direnv +
.envrc, preparing.envor CI variables for deployment or test CI, and reading likeexport $(cat .env | xargs)in the script is also simple and good. Since the list of environment variables set by direnv can be obtained in JSON format with thedirenv export jsoncommand, application such as passing it to CI and examining environment differences is also possible.
In summary, direnv is mainly a local development support tool, and its position in CI/CD is that it can be used or not depending on the situation. Since there are already secure variable injection methods in CI, it is safe to prioritize them. However, to avoid discrepancies in environment variable values between development and production, preparing a mechanism to apply settings used in direnv to CI as is will reduce discrepancies with the production environment.
Links to Official Resources
Finally, we introduce official resources as further information sources regarding direnv.
- Official Site/Docs: direnv.net – Installation procedures, basic usage, FAQ, etc. are posted. Especially "Community Wiki" has various Tips and recipes, worth reading.
- GitHub Repository: direnv/direnv - GitHub – Source code and Issue tracker of direnv. Discussion of new features and bug reporting are done here. CHANGELOG and README are also available.
- Man Page:
man direnvcommand, or Online Manual – You can check command details and stdlib function list. - Community: There are official chats on Matrix and GitHub Discussions. If you have trouble, try asking questions and you might get answers from developers or users.
Please utilize official information and master direnv.